
Comparative Analysis of Consensus Algorithms
In this simulation, we will explore two different consensus algorithms: Proof of Work (PoW) and Proof of Stake (PoS).
Proof of Stake (PoS) Workflow
This simulation demonstrates how Proof of Stake (PoS) selects a validator based on stake distribution and automatically creates blocks from pending transactions.
Step 1: Configure Proof of Stake
- Select Proof of Stake (PoS) as the consensus mechanism.
- Distribute stake percentages among all nodes (Alice, Bob, Carol, and Dave).
- The total stake must be exactly 100% to proceed.
- Nodes with higher stake have a higher chance of being selected as the validator.
- The system displays a message indicating which node is most likely to validate the next block based on stake.
- Click Confirm Stake Allocation & Next to initialize the network.

At this stage, the network is configured for stake-based validator selection.
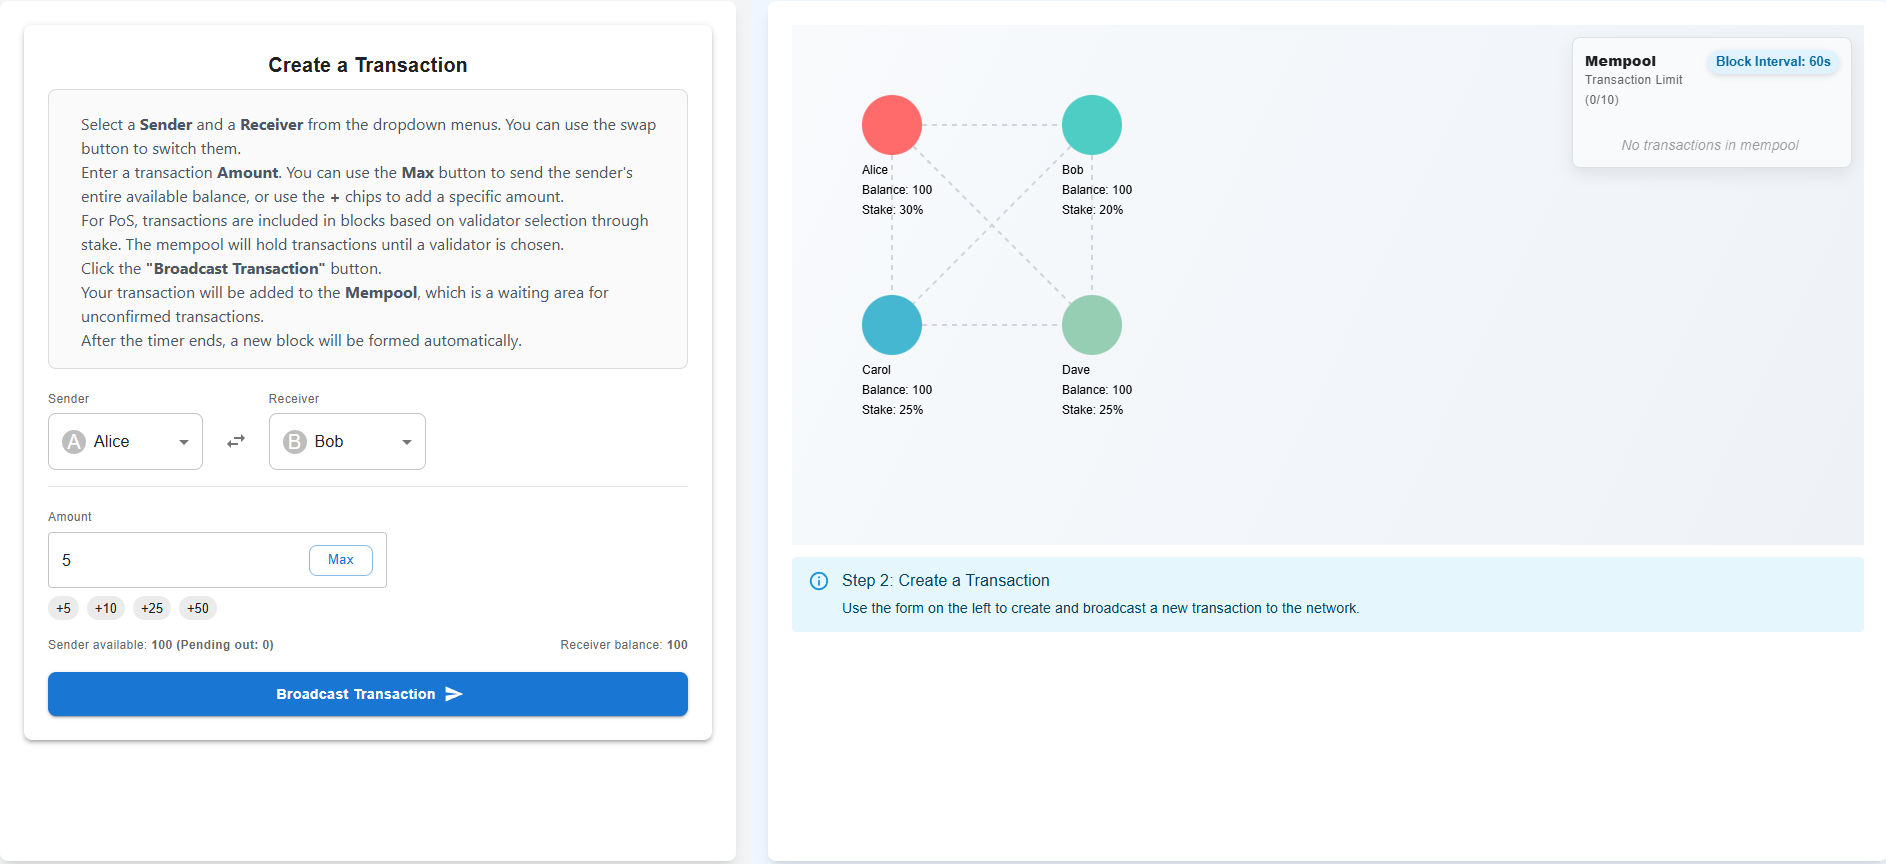
Step 2: Create and Broadcast a Transaction
- Use the Create a Transaction panel on the left:
- Select a Sender and Receiver.
- Enter the transaction amount (or use the quick-add buttons).
- Click Broadcast Transaction.
- The transaction is added to the mempool, which temporarily stores pending transactions.
Broadcasting the first transaction automatically starts the block interval timer.
Step 3: Validator Selection and Block Countdown
- Once at least one transaction is in the mempool:
- A block countdown timer starts (shown as Block Interval: 60s).
- You may add more transactions while the timer is running.
- When the timer ends:
- A validator is selected automatically based on stake percentage.
- The selected validator is:
- Highlighted in green
- Labeled as Validator
- A message confirms the selected participant and explains why they were chosen (highest stake).
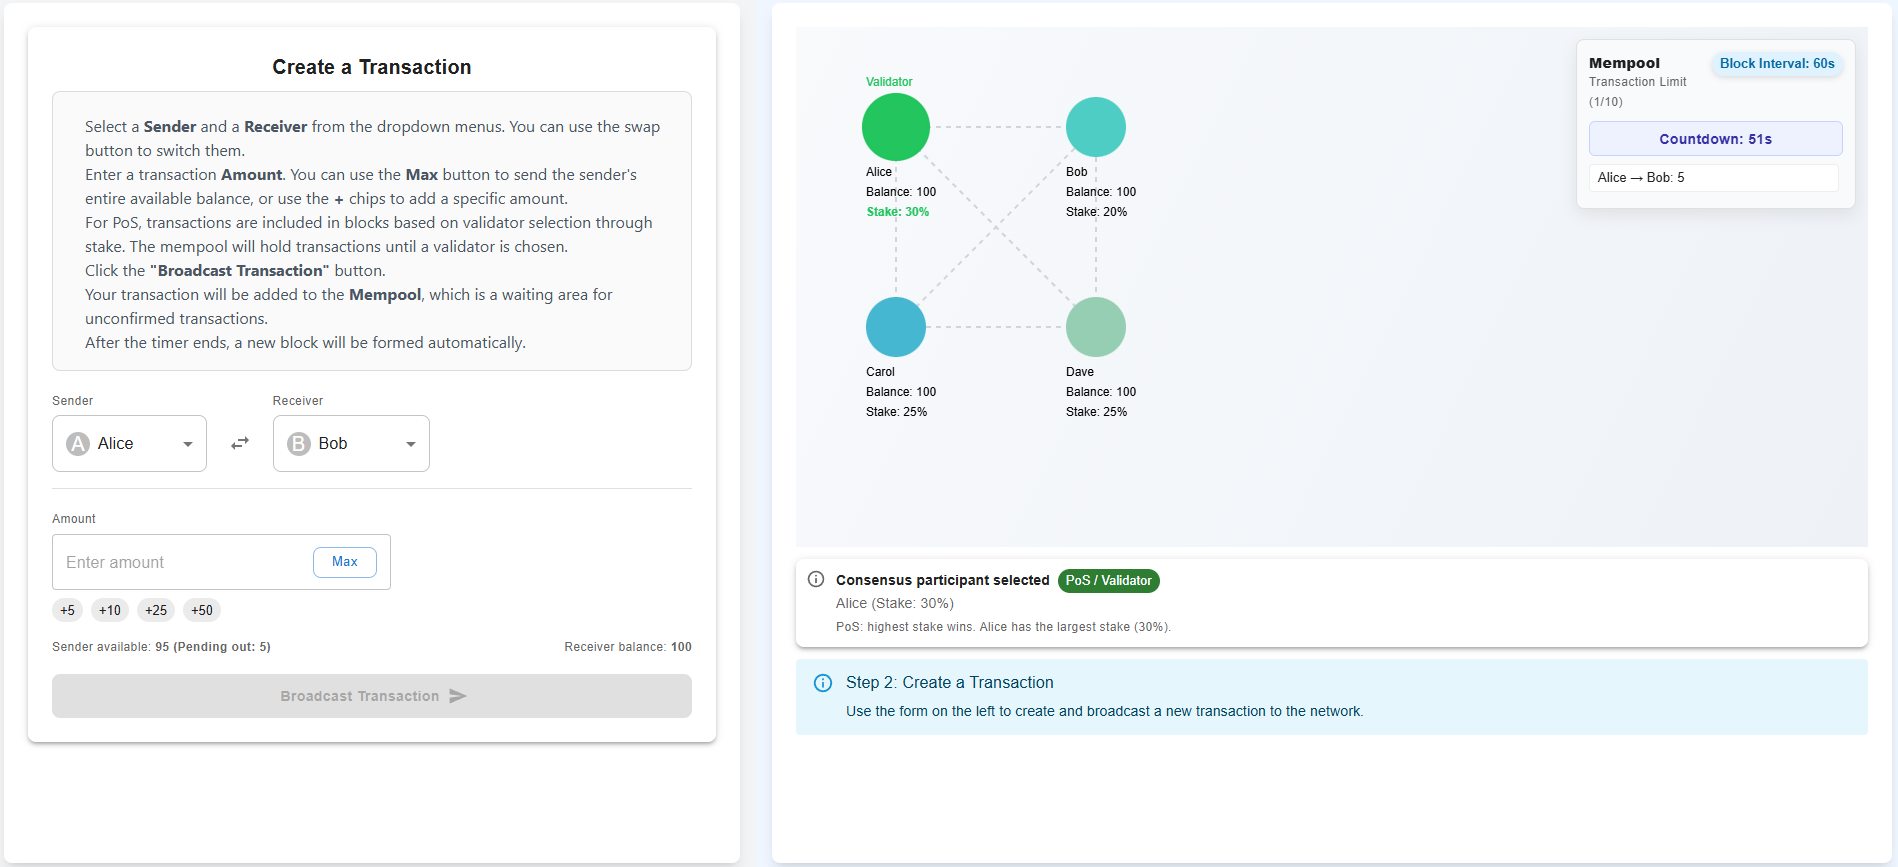
In PoS, validators are chosen probabilistically, with higher stake increasing selection likelihood.
Step 4: Block Creation and State Update
- After validator selection:
- The validator creates a new block using all transactions in the mempool.
- The block is added to the blockchain.
- Sender and receiver balances are updated.
- Stake percentages are recalculated based on updated balances.
- The mempool is cleared and ready for new transactions.
- A confirmation message appears indicating Block #1 Added.
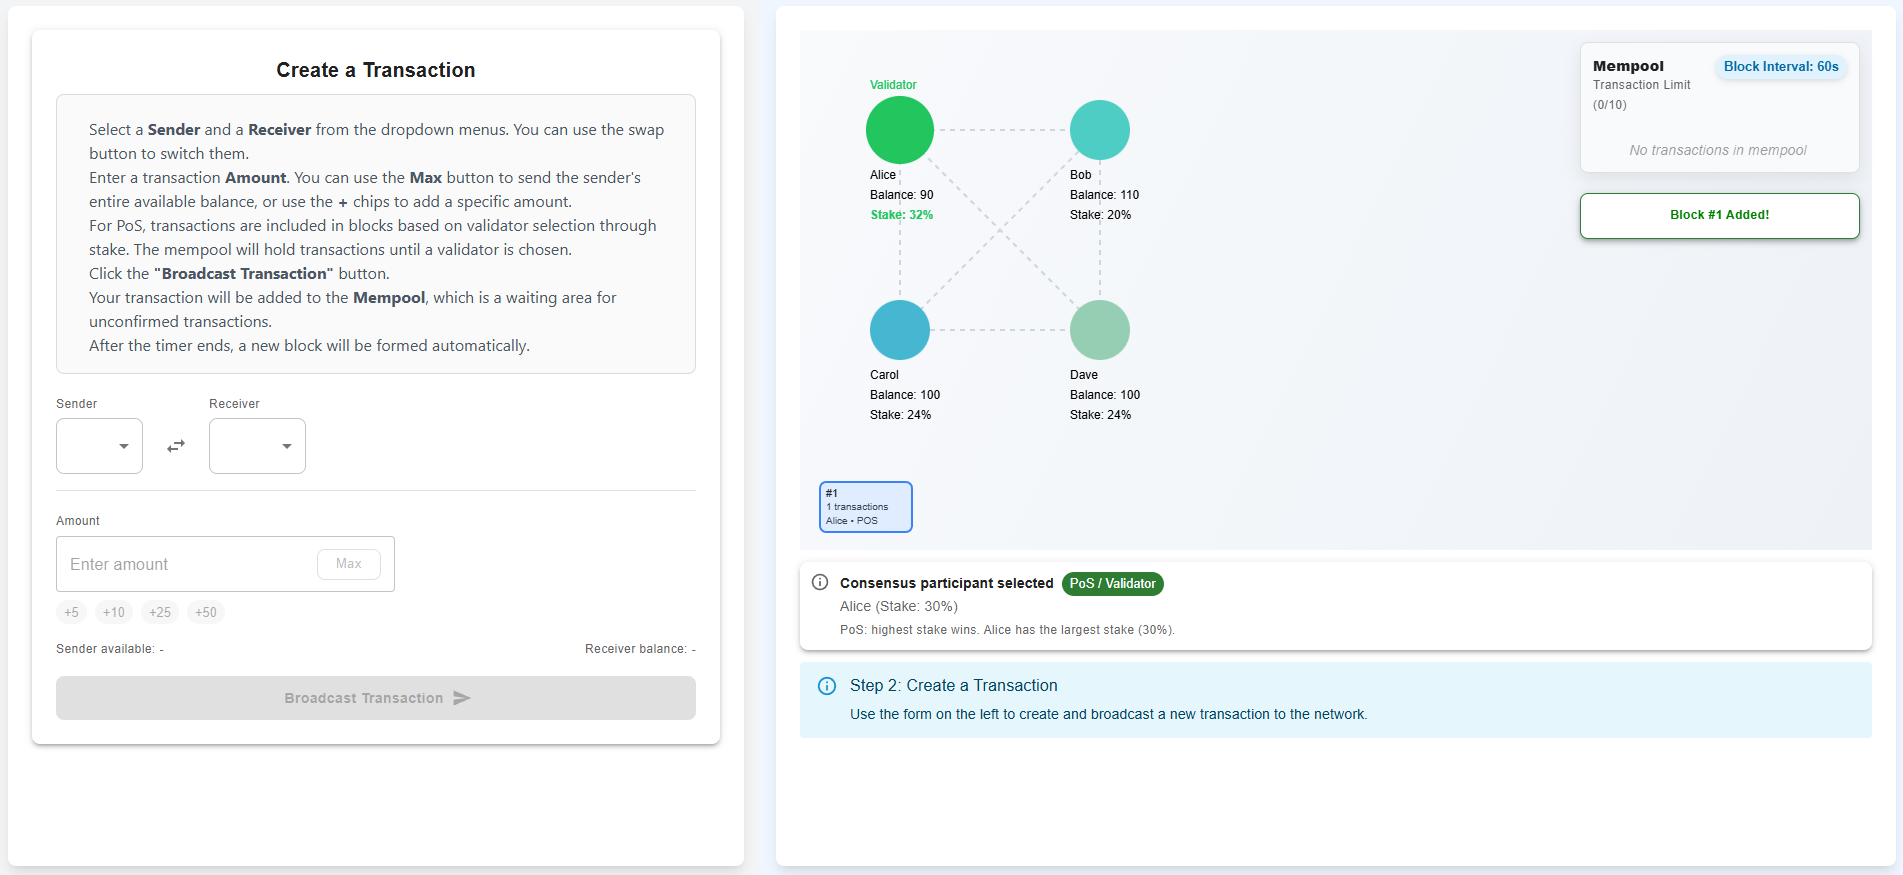
The system is now ready for the next transaction and block cycle.
Proof of Work (PoW) Workflow
This simulation demonstrates how Proof of Work (PoW) enforces a mining delay using difficulty and how blocks are created automatically after the countdown completes.
Step 1: Configure Proof of Work
- Select Proof of Work (PoW) as the consensus mechanism.
- Set the Difficulty level using the slider.
- Increasing difficulty:
- Increases the block interval (mining time).
- Reduces the maximum number of transactions allowed in the mempool.
- Increasing difficulty:
- The selected difficulty value is displayed below the slider.
- Click Confirm Difficulty (popup) and proceed to the next step.
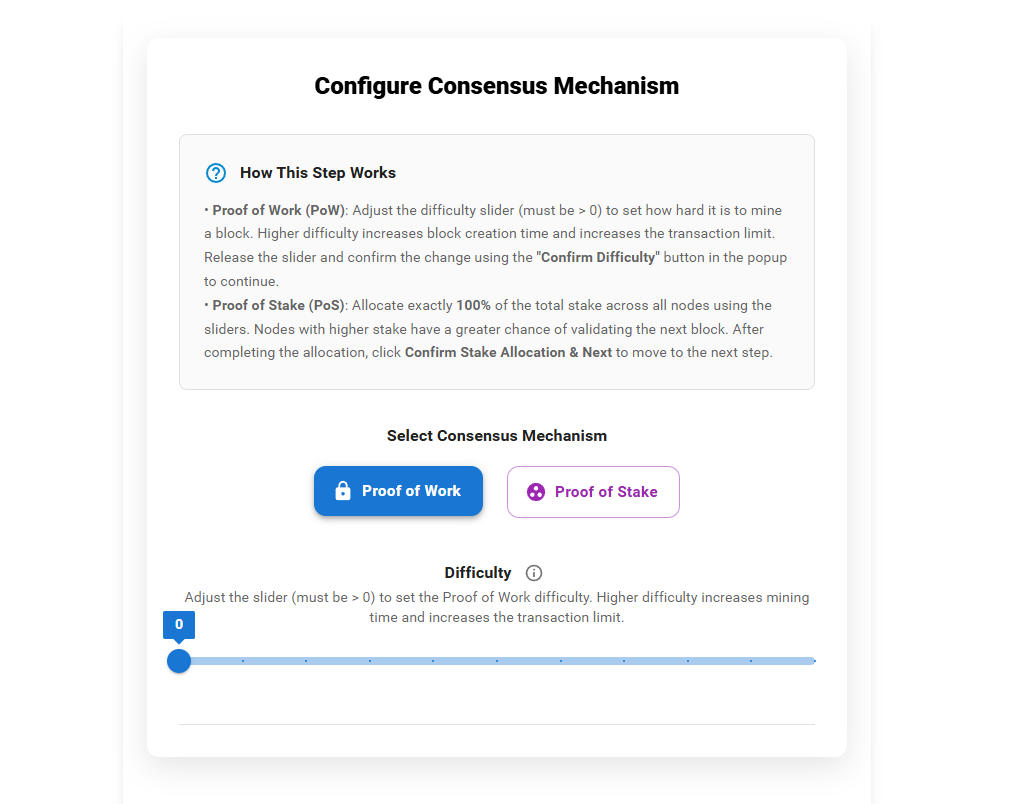
This step initializes the network with a difficulty-based mining delay.
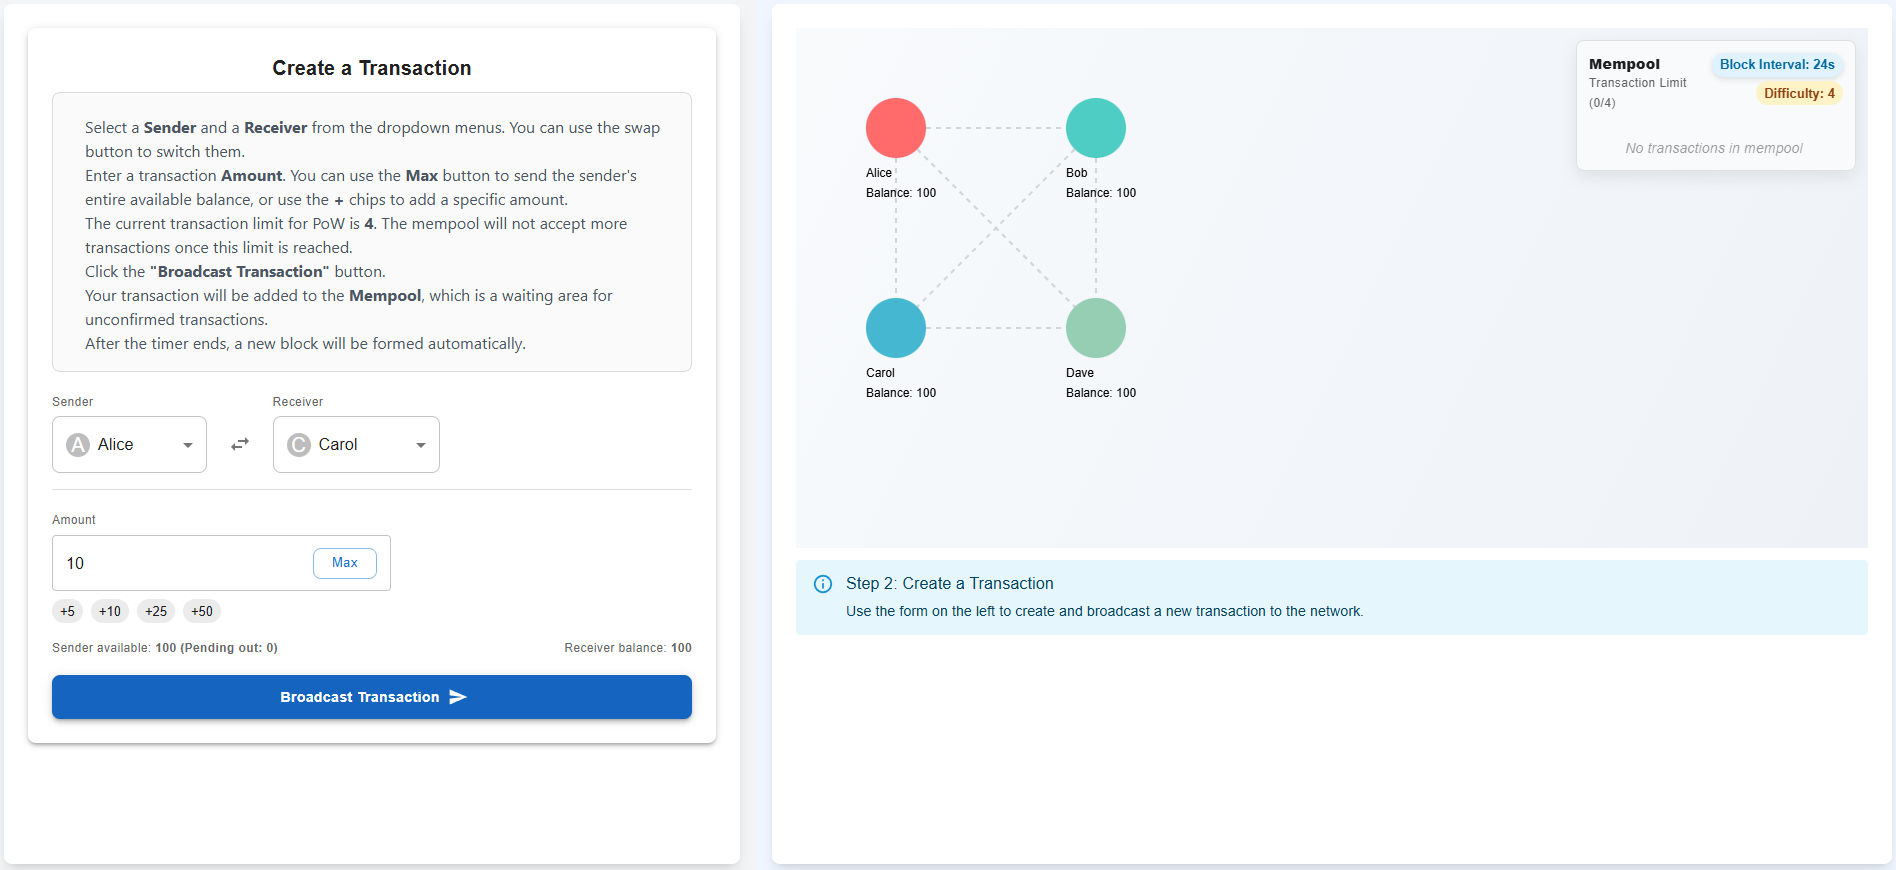
Step 2: Create and Broadcast a Transaction
- Use the Create a Transaction panel:
- Select a Sender and Receiver.
- Enter the transaction amount (or use quick-add buttons).
- Click Broadcast Transaction.
- The transaction is added to the mempool, which temporarily stores pending transactions.
- The mempool enforces a transaction limit based on the selected difficulty.
Broadcasting the first transaction automatically starts the mining countdown.
Step 3: Mining Countdown and Miner Selection
- Once the mempool contains at least one transaction:
- A countdown timer appears (e.g., Countdown: 25s).
- The countdown duration depends on the selected difficulty.
- During this time:
- All nodes are treated as potential miners.
- Additional transactions can be added until the mempool limit is reached.
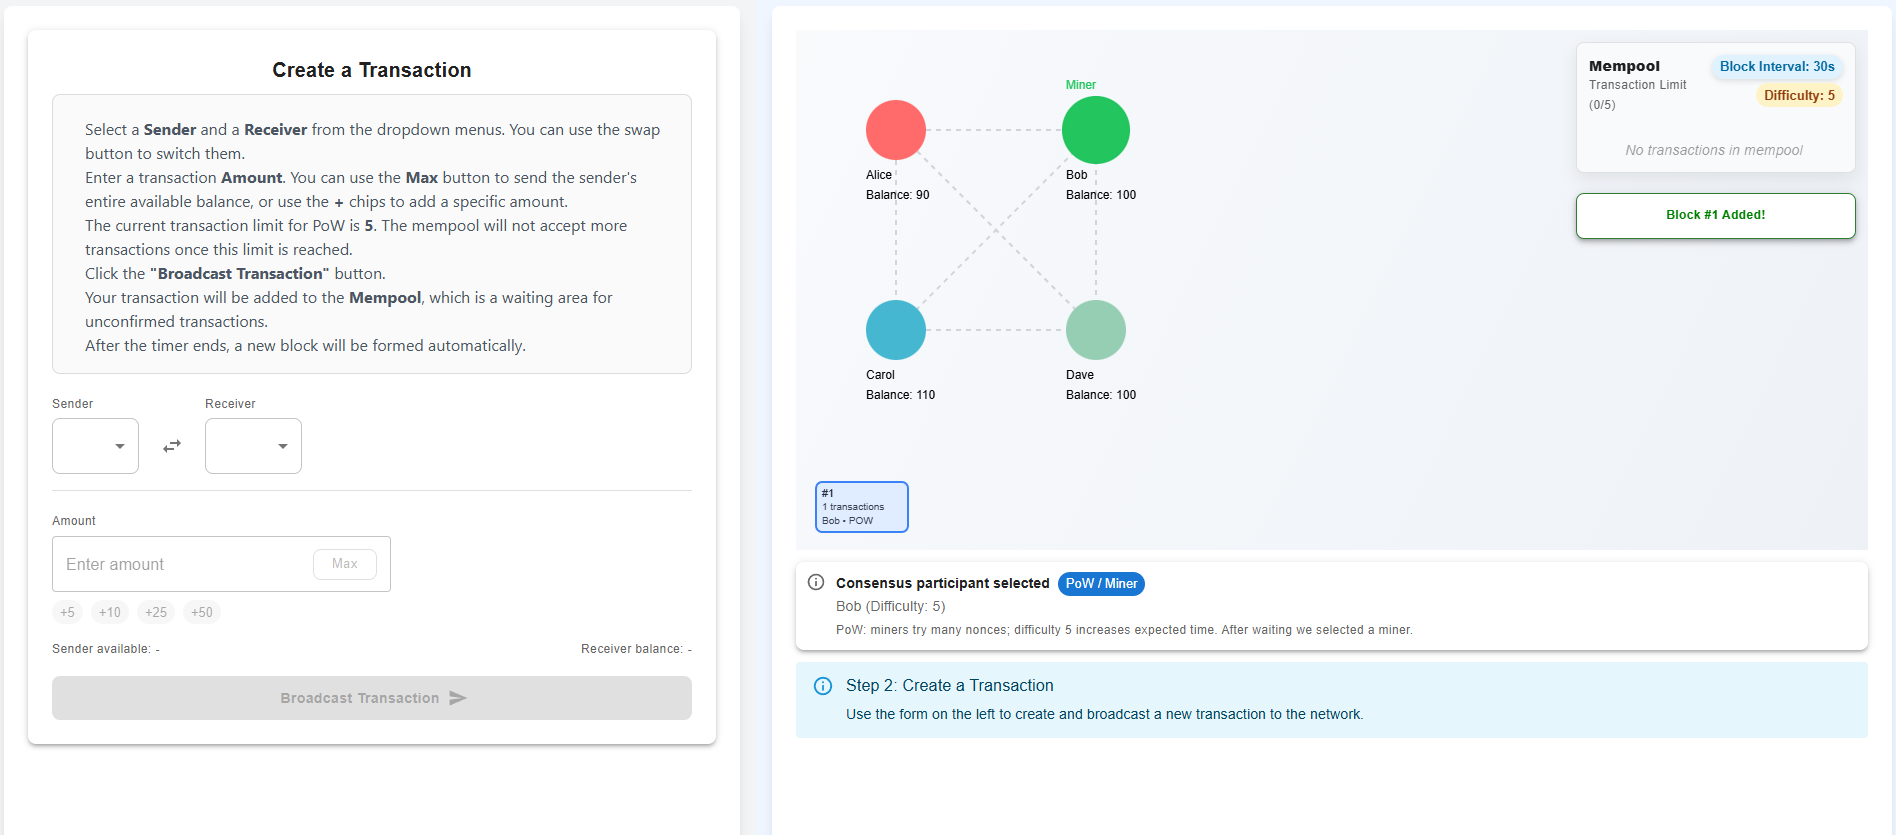
- When the timer ends:
- One node is selected as the miner.
- The selected miner is highlighted in green and labeled Miner.
- A message explains the miner selection and difficulty used.

In this simulation, PoW mining is represented as a time-based delay, not actual hash computation.
Step 4: Block Creation and Network Update
- After miner selection:
- The miner creates a new block using all transactions in the mempool.
- The block is added to the blockchain.
- Sender and receiver balances are updated.
- The mempool is cleared.
- A confirmation message appears indicating Block #1 Added.
The system is now ready for the next mining cycle.